Showing posts with label brick. Show all posts

Saturday, March 19, 2016

Papercraft Chimneys

I got frustrated trying to saw a notch in some plastic HO scale chimneys, so I decided to make my own.


I started with the working drawings from the Great Northern Historical Society's Modelers' Pages (#392, "Section Houses and Facilities.")


I'd already enlarged the image to use as a template for making walls and roofs, so I just scanned my enlargement at 100% as a starting point. I opened The Gimp, and used one of Clever Models' excellent brick textures to make a simple box with a notch on the bottom. I used that scan of the enlargement to get the size and shape of the chimney correct. I inkjet printed the result on matte photo cardstock, along with a partial sheet of just the brick texture. I cut and assembled the chimneys, adding strips of heavy black cardstock to the interior as I folded, to give it a little thickness. I touched up the edges with gouache paint as I went along. I cut two strips from the brick texture -- one strip was three bricks wide, the other, one brick wide -- and I wrapped them around the chimneys near the top.

The first chimney must have taken about 45 minutes to make, and I messed it up badly and threw it out. By the time I'd made three, they all looked uniformly nice and my time dropped to about 15 minutes for each.

Here is one of the chimneys test-fitted to the roof I completed earlier.


 I opted to scratch-build these four models for my client rather than buy and assemble four GNHS kits, since it's actually a savings for him -- cutting the pieces myself and assembling them takes only slightly more time than merely assembling a kit. This also means the money I would have spent on the kits -- which are about $25 each -- goes directly in my pocket. Another advantage to me is: I only charge the client for the time spent on the buildings I make for him, and I track my time very carefully, so as I go along, I can make a fifth model on my own time and at my own expense, and sell it to another client later.

Wednesday, January 14, 2015

Stereo Views of the Small Brick Machine Shop

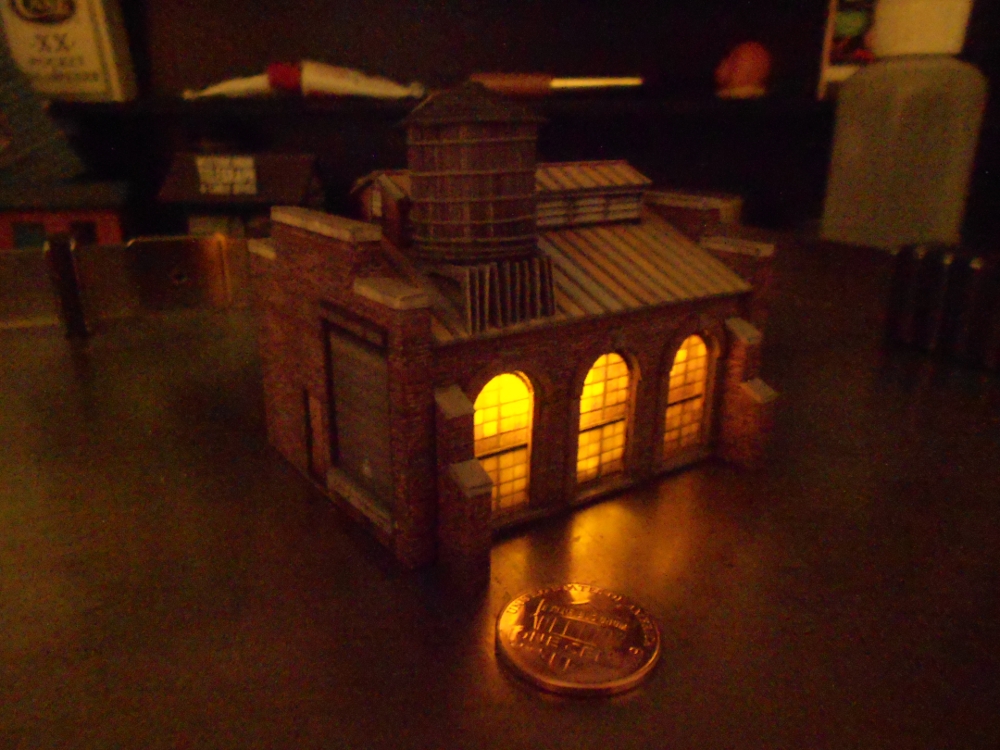
Finally got a new battery in the better camera, so here are some slightly-better-than-before stereoscopic shots to document the Clever Models Small Brick Machine Shop build.

As usual, these images are for free-viewing, not cross-eyed. US penny for scale.


Monday, January 12, 2015

Clever Models Small Machine Shop in N Scale -- COMPLETED!

I'm pleased with how nicely this building from Clever Models turned out. The supports for the water tank are a little wonky, but not too bad.


Here it is with a Dollar Store tea light LED in it. The flicker makes it look as if someone is using a forge or welding.


Wednesday, October 29, 2014

Ghost Signs for Cardstock Models using The Gimp

Inspired by the Fading Ad Blog, I tried my hand at creating a couple ads to drop onto a Clever Models texture sheet.


The Harold Lloyd sign on the top may seem unlikely -- why have a painted sign for a movie that might only run a few weeks? -- but it is based on an actual sign re-discovered a few years ago in Vancouver, B.C. when another building was torn down.


Seems the theater owner knew a building was going up and decided he could splash out with a painted sign. I changed a few things like the theater name and some colors, but I tried to match the fonts fairly closely.

 The second is my very liberal interpretation of an actual sign; the real sign used much less decorative fonts. This is always a decision you get to make when you're designing -- do I want it to look authentically old-time, or should I go for more of a modern idea of what "old-timey" is supposed to look like? Generally, the past was less fancy than we think, but sometimes I throw reality to the wind, because I like to fool around with fonts.

Here is how they look when I drop them on top of the Clever Models texture and lower the opacity of the sign layer.


 If I'm modeling a later era, I can lower the opacity still more to simulate further fading.


I got to fooling around with this, and decided I wanted to create the effect of a recently painted wall, which would make sense with that Harold Lloyd sign, since it was only supposed to be visible for a short time. Creating this effect is tricky using this technique -- by the time you drop the opacity just enough to see the wall (around 75% to 80%) you've created the illusion the paint has faded for quite a number of years.  But it's not impossible. The first step of the workaround is this:


(1) Copy two parts of the brick background that correspond to the areas covered by the painted signs, and (2) paste them as a new layer. Then (3) desaturate the colors to bring them down to greyscale, (4) invert them to make the dark areas light and light areas dark, and finally (5) adjust the brightness and contrast to make the shadows really pop.

Now when you make the translucent sign layer visible on top of this "white paint," it causes the the whites and light colors appear freshly painted, but you can still see a brick texture through them.


Naturally, all this works with Photoshop, too.

Tuesday, October 23, 2012

Disneyland Train Depot


This is a roughly HO-scale model of the Disneyland Main Street train depot. It was designed by Robert Nava and can be downloaded from his website, The Disney Experience.

I built it at about 1/2 the intended size, which makes it roughly 1/87th scale. It's laser-printed cardstock, and all pieces were hand-cut by me, including a lot of Victorian trim around the gables, dormers and support pillars.  I printed the flags double-sided on thinner paper, and used sewing pins as the poles. To eliminate all the white edges of the paper, I trimmed with gouache paint.

Video includes an excerpt from the song, "What? No Mickey Mouse?"