Showing posts with label structure. Show all posts

Tuesday, May 12, 2015

N Scale Lighthouse build, continued

Finished the roof this morning. The gable isn't a great fit, but the flaws are under the soffit... so, "F" it.


I put the coin battery into the underside of the carved pink foam base. For the moment, this works pretty well -- the foam presses the wires from the LED into the battery nicely. In the long term, I'll be able to pull the leads down and work them into layout wiring.

Next: painting and landscaping the pink foam.

Saturday, May 9, 2015

N Scale Cape Disappointment Lighthouse

My interest in the Ilwaco Railway & Navagation Company led me to building the lighthouse at Cape Disappointment. It shares with the railroad similar stories of North Coast incompetence: the tower was built first, but when the lamp lenses arrived, they were too big. It took two years for the tower to be rebuilt to fit the lenses. However, when the lighthouse was finally completed, it couldn't be seen by ships approaching from the North, and a second lighthouse was erected two miles away at North Head.

Oh, and the fog bell couldn't be heard over the rain and surf. Apart from that, Mrs. Lincoln...


I started out with a downloaded kit from Fiddler's Green ($4.95). FG models are often a decent starting point -- most of the geometries are already figured out for me, and I can usually modify what's there to make it more accurate... or more to my liking, anyway.

My first step was to alter the textures a bit. I opened the files in The Gimp, then used some roof tiles from Clever Models and surface textures from Dave Graffam Models, and overlaid them on the appropriate parts to replace the the cartoon-y colors of the FG kit. Then I reduced all the parts down to N scale and printed them on matte photo cardstock.

There are a few inaccuracies on the FG model. The cone shape goes through the lower walkway and all the way up to the bottom of the upper walkway, while on the real tower, the lamp house continues down through both walkways. I chopped off the top of the tower and fabricated a new lower lamp house from black cardstock. Also, the FG roof is roughly the shape of a Chinese sun hat, while the actual roof is more of a dome.

I built the lamp house first and worked my way down. I knew from the start I wanted to have a light in this, so I poked two pinholes into the center of the upper walkway and inserted an amber LED. By coincidence, a typical LED is about the same size, in N scale, as a lighthouse lamp. Soldering the leads to wires was tricky because the paper bits were so close, but it worked out okay. I added some heat-shrink tubing to prevent the leads from short-circuiting.

I still have the smaller work room and mud room to finish, but that's really straight-ahead model building.

Friday, January 16, 2015

Stereoscopic N Scale Hotel Railing

Just started experimenting with toughening up paper using thin cyanoacrylate. This allows me to cut very, very fine detailed parts without the cardstock delaminating. Here's a balcony railing from an Old-West type building.

I came up with a technique for curing the the cyanoacrylate quickly. I hold the uncut piece in one of the clamps of my Helping Hands tool, and apply the thin super glue along the back of the paper, so it wicks in. Then, because the catalyst that makes cyanoacrylate set is moisture, I just put a steaming cup of water under the piece, and let the rising vapors do the work. 30 seconds or so, and it's ready.

 If I don't do this, I've found myself looking at the piece stuck to my finger.

Monday, January 12, 2015

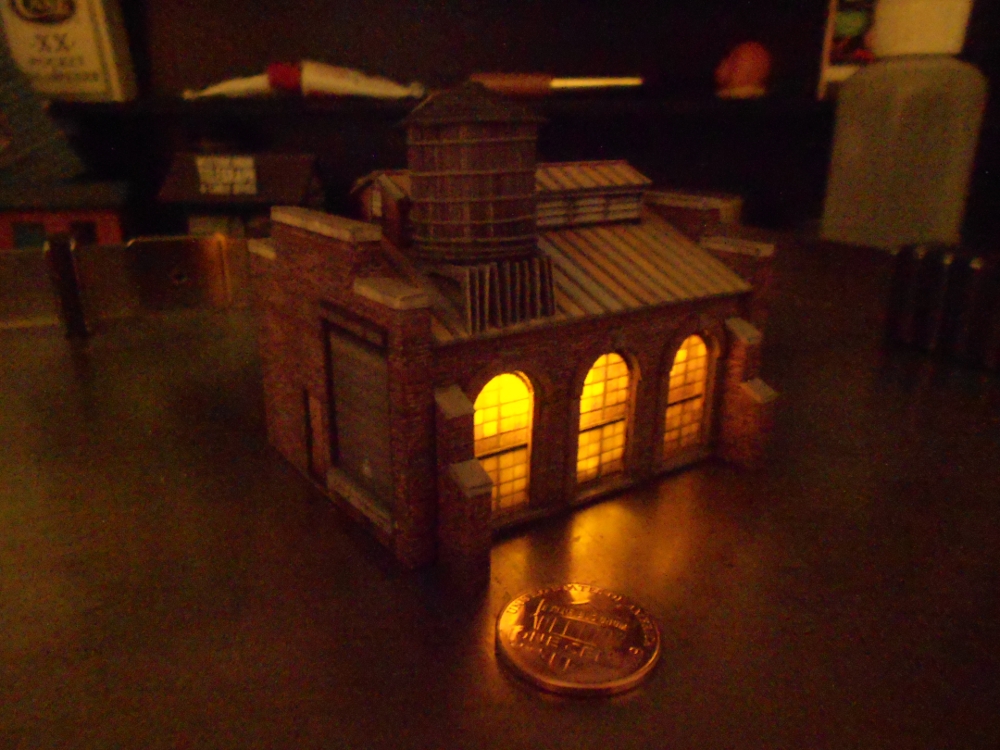
Clever Models Small Machine Shop in N Scale -- COMPLETED!

I'm pleased with how nicely this building from Clever Models turned out. The supports for the water tank are a little wonky, but not too bad.


Here it is with a Dollar Store tea light LED in it. The flicker makes it look as if someone is using a forge or welding.


Sunday, November 23, 2014

Finishing the O Scale Bike Shop

Got the last of the pieces cut out and mounted to cardboard, and assembled it today.

Here it is, dryfitted together. No floor or roof yet.


A view inside, with the window shade showing.


AAAND... the views of the completed model in 3D.

For cross-eyed viewing:


For free-viewing:


Wednesday, October 29, 2014

BLOGROLL: The Fading Ad Blog

Quickly becoming one of my faves is The Fading Ad Blog, which documents old signage. Lots of useful examples of ghost signs, billboards and other signs.