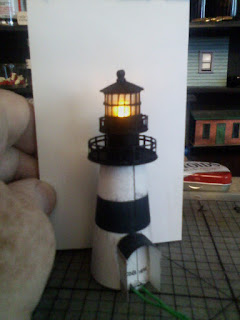
My interest in the Ilwaco Railway & Navagation Company led me to building the lighthouse at Cape Disappointment. It shares with the railroad similar stories of North Coast incompetence: the tower was built first, but when the lamp lenses arrived, they were too big. It took two years for the tower to be rebuilt to fit the lenses. However, when the lighthouse was finally completed, it couldn't be seen by ships approaching from the North, and a second lighthouse was erected two miles away at North Head.
Oh, and the fog bell couldn't be heard over the rain and surf. Apart from that, Mrs. Lincoln...
I started out with a downloaded kit from Fiddler's Green ($4.95). FG models are often a decent starting point -- most of the geometries are already figured out for me, and I can usually modify what's there to make it more accurate... or more to my liking, anyway.
My first step was to alter the textures a bit. I opened the files in The Gimp, then used some roof tiles from Clever Models and surface textures from Dave Graffam Models, and overlaid them on the appropriate parts to replace the the cartoon-y colors of the FG kit. Then I reduced all the parts down to N scale and printed them on matte photo cardstock.
There are a few inaccuracies on the FG model. The cone shape goes through the lower walkway and all the way up to the bottom of the upper walkway, while on the real tower, the lamp house continues down through both walkways. I chopped off the top of the tower and fabricated a new lower lamp house from black cardstock. Also, the FG roof is roughly the shape of a Chinese sun hat, while the actual roof is more of a dome.
I built the lamp house first and worked my way down. I knew from the start I wanted to have a light in this, so I poked two pinholes into the center of the upper walkway and inserted an amber LED. By coincidence, a typical LED is about the same size, in N scale, as a lighthouse lamp. Soldering the leads to wires was tricky because the paper bits were so close, but it worked out okay. I added some heat-shrink tubing to prevent the leads from short-circuiting.
I still have the smaller work room and mud room to finish, but that's really straight-ahead model building.


What a great model! You are very talented, and you make it look almost easy. Thank you for sharing your info and photo.
ReplyDelete